Feeds:
Posts
Comments

Archive for August, 2013

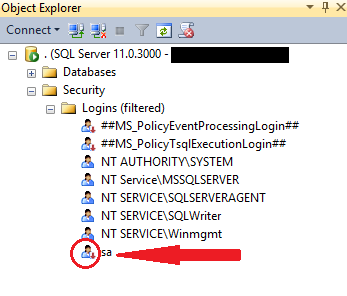
Ever noticed and wondered why the well-known SQL Server system administrator (sa) login is in a disabled state?

SA Login

The reason is simple, sa login account is disabled out of the box (by default) in Windows Authentication mode. You have to enable manually to use it.

On the other hand, if you request Mixed Mode Authentication during installation, SQL Server Setup prompts you to set an sa login password. So sa login account is enabled in this case.

Enable/Disable sa login using SSMS GUI:

  • From the Object Explorer, expand “Security” and then expand “Logins” –> Right click on sa and select “Properties”

SA Login - 1

  • On the “General” tab, create a strong password

SA Login - 2

  • On the “Status” tab, click “Enabled”, and then click “ok” (If sa is already enabled, you have to chose “Disabled” to disable the same)

SA Login - 3

Enable sa login using T-SQL script:

ALTER LOGIN sa ENABLE ;
GO
ALTER LOGIN sa WITH PASSWORD = '$trongPa$$w@rD';
GO

Disable sa login using T-SQL script:

ALTER LOGIN sa DISABLE ;
GO

Here’s some more info about “sa” account:

  • System administrator (sa) is a special login provided for backward compatibility
  • Usually there is no effect sa being in a disabled state though it pertains and owns the system databases
  • By default, sa login is assigned to the sysadmin fixed server role and cannot be changed
  • Microsoft do not recemmond using sa login in application (as it is often targeted by malicious users)
  • However, Microsoft recommonds using sa only when there is no other way to log in to an instance
  • The sa login cannot be removed/deleted

Technical Reviewer: Jaipal Vajrala

Advertisement

Read Full Post »

Most of the DBAs at some point of time in their career should have faced at-least one of the below situation(s):

1. The disk/SAN where the database files are located is going to be replaced
2. Disk is full and no more free space available
3. Data files and/or log files are not located on standard drives

There can be even more secnarios like the above where we may need to move the database files from current location to a new location. Starting SQL Server 2005 this can be simply achieved by using ALTER DATABASE T-SQL command

Let us take the below scenario for step-by-step Demo:

Database: AdventureWorks2012
Current Files Location: C:\Disk1
New\Target Files Location: C:\Disk2

Step 1: Get the current database files Logical Name and Physical Location

USE master
GO
SELECT name AS LogicalFileName, physical_name AS FileLocation
, state_desc AS Status 
FROM sys.master_files 
WHERE database_id = DB_ID('AdventureWorks2012');
1

Step 2: Take the Database offline

USE master
GO
ALTER DATABASE AdventureWorks2012 SET OFFLINE WITH ROLLBACK IMMEDIATE
GO

2

Note: In the above T-SQL query, I used WITH ROLLBACK IMMEDIATE option. Please be careful when using this option as it rolls back those incomplete transactions immediately. You may exclude this option, but have to wait till all the transactions are committed to take the database offline.

Step 3: Move the database files physically in the Windows OS to the new location

3

4

Step 4: Use ALTER DATABASE to modify the FILENAME to new location for every file moved

Only one file can be moved at a time using ALTER DATABASE.

USE master
GO
ALTER DATABASE AdventureWorks2012
MODIFY FILE 
( NAME = AdventureWorks2012_Data, 
FILENAME = 'C:\Disk2\AdventureWorks2012_Data.mdf'); -- New file path

USE master
GO
ALTER DATABASE AdventureWorks2012 
MODIFY FILE 
( NAME = AdventureWorks2012_Log, 
FILENAME = 'C:\Disk2\AdventureWorks2012_log.ldf'); -- New file path
5

Step 5: Set the database ONLINE

USE master
GO
ALTER DATABASE AdventureWorks2012 SET ONLINE;

Step 6: Now, verify the database files Physical location

USE master
GO
SELECT name AS FileName, physical_name AS CurrentFileLocation, state_desc AS Status 
FROM sys.master_files 
WHERE database_id = DB_ID('AdventureWorks2012');
6

Note: Same method can be used for moving files for any system or user defined database except for Resource database files

Read Full Post »

Cleaning/deleting the old backup files is equally important as taking the backups. Doing so we can (i) Avoid overhead cost for the storage space, and (ii) Ensure and retain enough space on the disk for the next successful backup

Using ‘Maintenance Plans’ this task will be a cake walk for the DBAs who are having hard time deleting the old backup files manually!

Below is the step by step process with screenshots showing how to setup and Automate backup files cleanup task using Maintenance Plans in SQL Server.

Step 1: Connect to the SQL Server instance, expand ‘Management’ folder, right click on ‘Maintenance Plans’ and select ‘Maintenance Plan Wizard’

BackUp Clean - 1

Step 2: ‘Maintenance Plan Wizard’ pops out, click Next

BackUp Clean - 2

Step 3: On the ‘Maintenance Plan Wizard’ give a Name and Description. To schedule this as a job, select Change under ‘Schedule’

BackUp Clean - 3

Step 4: ‘New Job Schedule’ pops out. Define a schedule. In my case I gave it to run Daily at 12:00:00 AM. Click ‘ok’ when done.

BackUp Clean - 4

Step5: Make sure everything is correct and click Next

BackUp Clean - 5

Step 6: Select the Maintenance Cleanup Task option and click Next

BackUp Clean - 6

Step7: Here we only have one task, so nothing to order/re-order. Click Next

BackUp Clean - 7

Step 8: This window is the heart for this task. Under ‘Delete files of the following type’ select Backup files. Under ‘File location’ select Search folder and delete files based on an extension. Give the path of the backup files location in Folder and “bak” (for native backups) in File extension. For Light Speed Backups you need to mention ‘lsb’.

Under ‘File age’ check the option Delete files based on the age of the file at task run time. Under ‘Delete files older than the following’ select a retention policy. I left the default 4 weeks. Click Next

BackUp Clean - 8

Step 9: The wizard will write a report to a text file to the defined Folder location. You can leave the default location or chose a location of your choice. Click Next

BackUp Clean - 9

Step 10: Click Finish

BackUp Clean - 10

This should create the Maintenance Plan ‘Delete old backup files’ as shown in the screenshot below

BackUp Clean - 11

Note: SQL Agent Services must be running in order to execute the above discussed Maintenance Plan.

Read Full Post »

Earlier today I was required to pull the list of all SQL Login Accounts, Windows Login Accounts and Windows Group Login Accounts (basically all the Logins along with the Account Type of the Login) on one of the SQL Server instance where there are close to a hundred Login Accounts existing.

Doing it from SSMS GUI will take forever. So, I wrote a simple T-SQL script using which I was able to pull out all that information in less than a second!

Get the list of all Login Accounts in a SQL Server

SELECT name AS Login_Name, type_desc AS Account_Type
FROM sys.server_principals 
WHERE TYPE IN ('U', 'S', 'G')
and name not like '%##%'
ORDER BY name, type_desc

Get the list of all SQL Login Accounts only

SELECT name
FROM sys.server_principals 
WHERE TYPE = 'S'
and name not like '%##%'

Get the list of all Windows Login Accounts only

SELECT name
FROM sys.server_principals 
WHERE TYPE = 'U'

Get the list of all Windows Group Login Accounts only

SELECT name
FROM sys.server_principals 
WHERE TYPE = 'G'

Note: Requires ALTER ANY LOGIN server permission to be able to view all the logins.

Read Full Post »